Interactive 3D watch using three.js
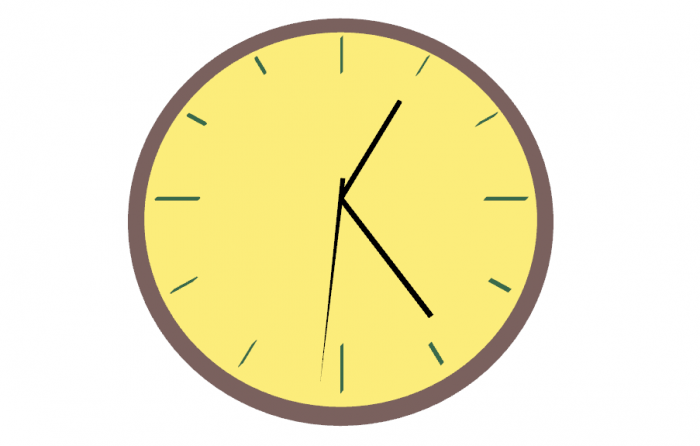
The goal of our today’s lesson is the continuation of studying webgl using the three.js library. We create interactive (ticking) three-dimensional classical watches that consists of following major elements: round dial, the clock arrows and moving arrows. Watch model will be located in space, so you will easily be able to rotate it in the scene for viewing the watch from any angle.
Live Demo
HTML
It has become common practice that we begin with the most simple – html markup:
index.html
<!DOCTYPE html>
<html lang="en" >
    <head>
        <meta charset="utf-8" />
        <meta name="author" content="Script Tutorials" />
        <title>Interactive 3D watch using three.js | Script Tutorials</title>
        <meta name="viewport" content="width=device-width, initial-scale=1.0, maximum-scale=1.0, user-scalable=no">
        <link href="css/main.css" rel="stylesheet" type="text/css" />
    </head>
    <body>
        <script src="js/three.min.js"></script>
        <script src="js/THREEx.WindowResize.js"></script>
        <script src="js/OrbitControls.js"></script>
        <script src="js/stats.min.js"></script>
        <script src="js/script.js"></script>
        <div style="position: absolute; top: 10px; left: 20px; text-align: center;"><a href="https://www.script-tutorials.com/interactive-3d-watch-using-three-js/" target="_blank">"Interactive 3D watch using three.js"</a><br>Drag to spin</div>
    </body>
</html>
There is nothing complicated – we only need to connect all the required libraries.
Javascript
Now we begin to implement our new webgl scene. First, let’s prepare the frame of the scene: add all variables, the scene, camera, renderer, controls and stats object:
js/script.js
var watch = {
    scene: null,
    camera: null,
    renderer: null,
    container: null,
    controls: null,
    clock: null,
    stats: null,
    arrowHr: null,
    arrowMin: null,
    arrowSec: null,
    timeHr: null,
    timeMin: null,
    timeSec: null,
    init: function() { // initialization
        // create main scene
        this.scene = new THREE.Scene();
        var SCREEN_WIDTH = window.innerWidth,
            SCREEN_HEIGHT = window.innerHeight;
        // prepare camera
        var VIEW_ANGLE = 45, ASPECT = SCREEN_WIDTH / SCREEN_HEIGHT, NEAR = 1, FAR = 5000;
        this.camera = new THREE.PerspectiveCamera( VIEW_ANGLE, ASPECT, NEAR, FAR);
        this.scene.add(this.camera);
        this.camera.position.set(0, 1500, 500);
        this.camera.lookAt(new THREE.Vector3(0,0,0));
        // prepare renderer
        this.renderer = new THREE.WebGLRenderer({antialias:true, alpha: false});
        this.renderer.setSize(SCREEN_WIDTH, SCREEN_HEIGHT);
        this.renderer.setClearColor(0xffffff);
        this.renderer.shadowMapEnabled = true;
        this.renderer.shadowMapSoft = true;
        // prepare container
        this.container = document.createElement('div');
        document.body.appendChild(this.container);
        this.container.appendChild(this.renderer.domElement);
        // events
        THREEx.WindowResize(this.renderer, this.camera);
        // prepare controls (OrbitControls)
        this.controls = new THREE.OrbitControls(this.camera, this.renderer.domElement);
        this.controls.target = new THREE.Vector3(0, 0, 0);
        // prepare clock
        this.clock = new THREE.Clock();
        // prepare stats
        this.stats = new Stats();
        this.stats.domElement.style.position = 'absolute';
        this.stats.domElement.style.bottom = '0px';
        this.stats.domElement.style.zIndex = 10;
        this.container.appendChild( this.stats.domElement );
    }
};
// Animate the scene
function animate() {
    requestAnimationFrame(animate);
    render();
    update();
}
// Update controls and stats
function update() {
    watch.controls.update(watch.clock.getDelta());
    watch.stats.update();
}
// Render the scene
function render() {
    if (watch.renderer) {
        watch.renderer.render(watch.scene, watch.camera);
    }
}
// Initialize lesson on page load
function initializeLesson() {
    watch.init();
    animate();
}
if (window.addEventListener)
    window.addEventListener('load', initializeLesson, false);
else if (window.attachEvent)
    window.attachEvent('onload', initializeLesson);
else window.onload = initializeLesson;
Now we begin to create watch elements. first we’ll create the dial and rim shapes. We need to add the following code in the end of the ‘init’ function:
  // add dial shape
  var dialMesh = new THREE.Mesh(
      new THREE.CircleGeometry(500, 50),
      new THREE.MeshBasicMaterial({ color:0xffffff * Math.random(), side: THREE.DoubleSide })
  );
  dialMesh.rotation.x = - Math.PI / 2;
  dialMesh.position.y = 0;
  this.scene.add(dialMesh);
  // add watch rim shape
  var rimMesh = new THREE.Mesh(
    new THREE.TorusGeometry(500, 20, 10, 100),
    new THREE.MeshBasicMaterial({ color:0xffffff * Math.random() })
  );
  rimMesh.rotation.x = - Math.PI / 2;
  this.scene.add(rimMesh);
Now we will create a watch dividers (arrows). Please note, that some arrows are a bit longer (as at real watches):
  // add watch arrow
  var iHours = 12;
  var mergedArrows = new THREE.Geometry();
  var extrudeOpts = {amount: 10, steps: 1, bevelSegments: 1, bevelSize: 1, bevelThickness:1};
  var handFrom = 400, handTo = 450;
  for (i = 1; i <= iHours; i++) {
    // prepare each arrow in a circle
    var arrowShape = new THREE.Shape();
    var from = (i % 3 == 0) ? 350 : handFrom;
    var a = i * Math.PI / iHours * 2;
    arrowShape.moveTo(Math.cos(a) * from, Math.sin(a) * from);
    arrowShape.lineTo(Math.cos(a) * from + 5, Math.sin(a) * from + 5);
    arrowShape.lineTo(Math.cos(a) * handTo + 5, Math.sin(a) * handTo + 5);
    arrowShape.lineTo(Math.cos(a) * handTo, Math.sin(a) * handTo);
    var arrowGeom = new THREE.ExtrudeGeometry(arrowShape, extrudeOpts);
    THREE.GeometryUtils.merge(mergedArrows, arrowGeom);
  }
  var arrowsMesh = new THREE.Mesh(mergedArrows, new THREE.MeshBasicMaterial({ color:0x444444 * Math.random() }));
  arrowsMesh.rotation.x = - Math.PI / 2;
  arrowsMesh.position.y = 10;
  this.scene.add(arrowsMesh);
All arrow geometries (ExtrudeGeometry) were merged (for better performance) into a single geometry (mergedArrows) using the ‘THREE.GeometryUtils.merge’ function. Finally, we will create three more arrows to point seconds, minutes and hours:
  // add seconds arrow
  handTo = 350;
  var arrowSecShape = new THREE.Shape();
  arrowSecShape.moveTo(-50, -5);
  arrowSecShape.lineTo(Math.cos(a) * handTo, Math.sin(a) * handTo);
  arrowSecShape.lineTo(-50, 5);
  var arrowSecGeom = new THREE.ExtrudeGeometry(arrowSecShape, extrudeOpts);
  this.arrowSec = new THREE.Mesh(arrowSecGeom, new THREE.MeshBasicMaterial({ color:0x000000 }));
  this.arrowSec.rotation.x = - Math.PI / 2;
  this.arrowSec.position.y = 20;
  this.scene.add(this.arrowSec);
  // add minutes arrow
  var arrowMinShape = new THREE.Shape();
  arrowMinShape.moveTo(0, -5);
  arrowMinShape.lineTo(Math.cos(a) * handTo, Math.sin(a) * handTo - 5);
  arrowMinShape.lineTo(Math.cos(a) * handTo, Math.sin(a) * handTo + 5);
  arrowMinShape.lineTo(0, 5);
  var arrowMinGeom = new THREE.ExtrudeGeometry(arrowMinShape, extrudeOpts);
  this.arrowMin = new THREE.Mesh(arrowMinGeom, new THREE.MeshBasicMaterial({ color:0x000000 }));
  this.arrowMin.rotation.x = - Math.PI / 2;
  this.arrowMin.position.y = 20;
  this.scene.add(this.arrowMin);
  // add hours arrow
  handTo = 300;
  var arrowHrShape = new THREE.Shape();
  arrowHrShape.moveTo(0, -5);
  arrowHrShape.lineTo(Math.cos(a) * handTo, Math.sin(a) * handTo - 5);
  arrowHrShape.lineTo(Math.cos(a) * handTo, Math.sin(a) * handTo + 5);
  arrowHrShape.lineTo(0, 5);
  var arrowHrGeom = new THREE.ExtrudeGeometry(arrowHrShape, extrudeOpts);
  this.arrowHr = new THREE.Mesh(arrowHrGeom, new THREE.MeshBasicMaterial({ color:0x000000 }));
  this.arrowHr.rotation.x = - Math.PI / 2;
  this.arrowHr.position.y = 20;
  this.scene.add(this.arrowHr);
All these arrows are extruded from flat shapes.
Now, the time has come to teach arrows ticking. For this we will need to add the following code to the ‘update’ function:
  // get current time
  var date = new Date;
  watch.timeSec = date.getSeconds();
  watch.timeMin = date.getMinutes();
  watch.timeHr = date.getHours();
  // update watch arrows positions
  var rotSec = watch.timeSec * 2 * Math.PI / 60 - Math.PI/2;
  watch.arrowSec.rotation.z = -rotSec;
  var rotMin = watch.timeMin * 2 * Math.PI / 60 - Math.PI/2;
  watch.arrowMin.rotation.z = -rotMin;
  var rotHr = watch.timeHr * 2 * Math.PI / 12 - Math.PI/2;
  watch.arrowHr.rotation.z = -rotHr;
Live Demo
[sociallocker]
download in package
[/sociallocker]
Conclusion
Stay tuned for new tutorials and you will always find something new and interesting for yourself.


